Chances are that your organization has employee expenses that need to be closely managed. Whether you have employees needing to book travel expenses daily or just the occasional business dinner, it is important to have tight control over how each employee’s expenses are submitted and approved. Microsoft Dynamics 365 has powerful expense management tools which allow your employees to submit expense reports while ensuring that business rules are followed and that all relevant information and documents are included. This blog will go over the setup and functionality of expense policies.

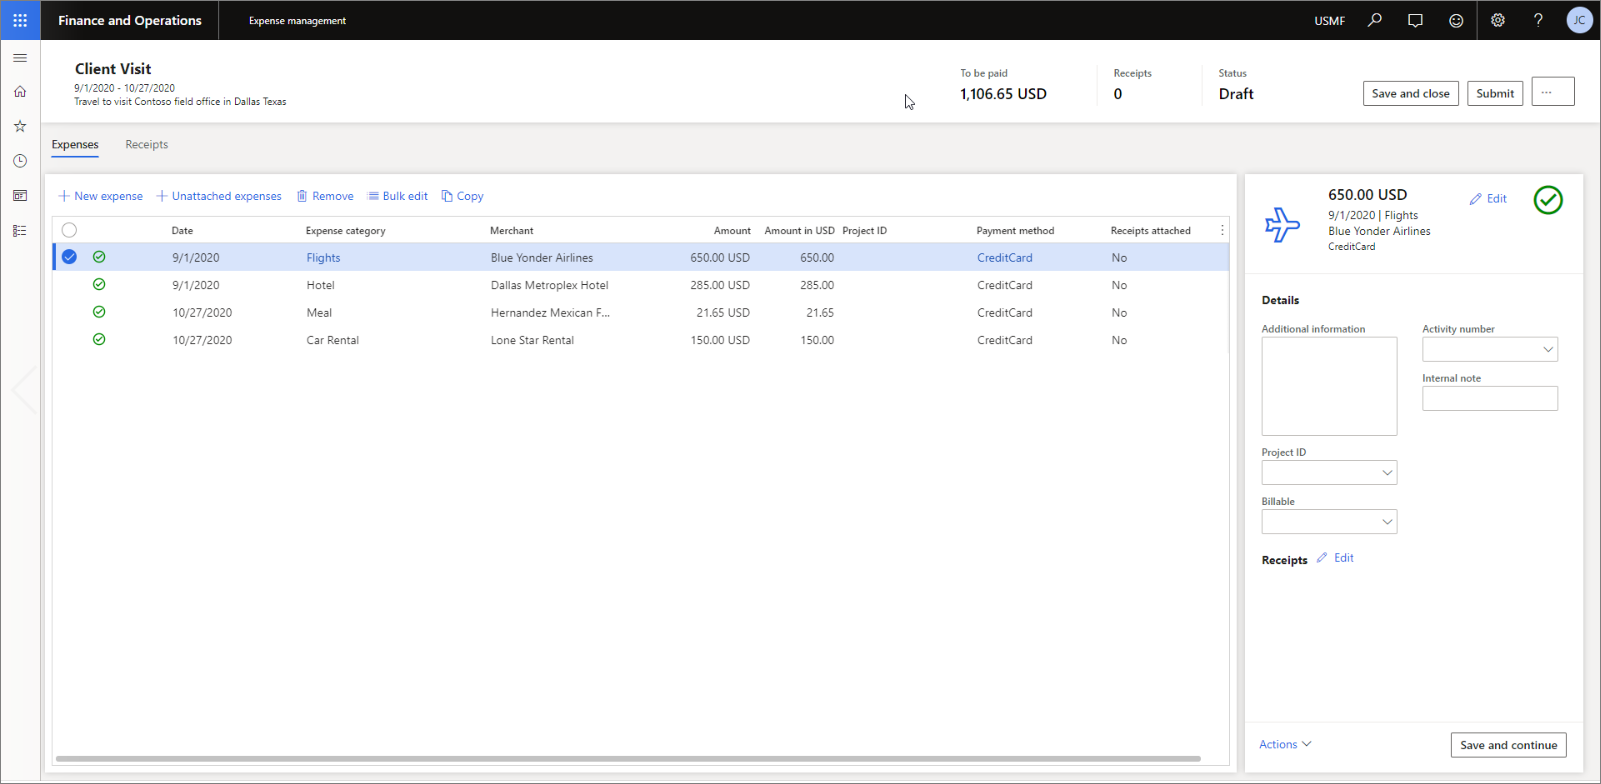
The Expense management workspace is the landing page for creating and submitting expense reports.
When entering an expense report line, at the bare minimum, expense category, transaction date, payment method, and transaction amount are mandatory – users will not be able to submit the report without entering all this information. This basic setup ensures that your organization at least gets this necessary information from the expense report. If your organization has more strict requirements and rules for expense report entry you may want to define policies that your employees must follow when entering and submitting expense reports.
Expense Policies
Expense policies in Dynamics 365 are a set of rules that an employee must adhere to before being allowed to submit an expense report. You can define policies that your workers must follow when entering and submitting expense reports and travel requisitions. Implementing expense policies can help you manage expenses effectively. This will allow your organization to manage expenses more efficiently and effectively. The system will ensure that an expense report follows all defined business rules before being pushed to the approver.
The following are a couple of examples where an expense policy may be used:
- Your company has a policy that travel meal expenses cannot exceed the amount of $25/meal.
- Your company has a policy that an expense report line exceeding $20 must include a receipt.
For the above examples, and many other situations, expense policies can be configured to give the user a warning, an error, or require a justification. If the user is given a warning the system allows the worker to submit an expense report, but the expense will be marked for all approvers and future reporting. If the user is given an error the system requires the worker to revise the expense to comply with the policy before submitting the expense report. If the entry requires justification the worker must enter a justification for exceeding the policy amount before submitting the expense report.

To set up an expense policy:

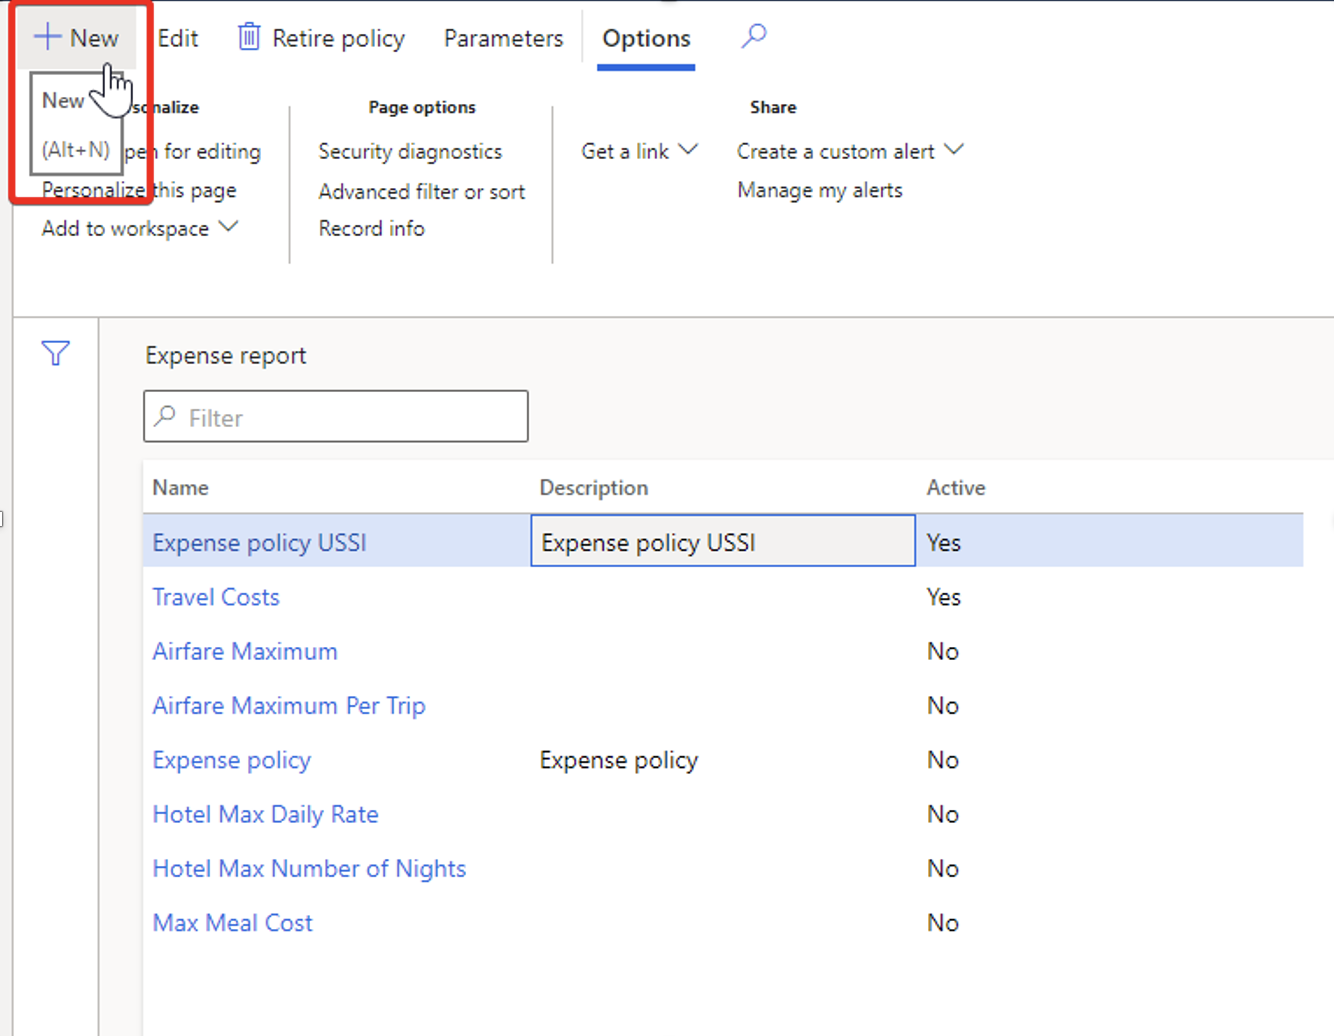
1) Navigate to: Expense Management > Setup > Policies > Expense Report
2) Select New > Policy
3) Enter a name and description for the policy
4) Choose what legal entities the policy will apply to
5) Expand the policy rule tab and select the type of policy rule that you would like to create, for example: Receipts Required
6) Click on Create policy rule
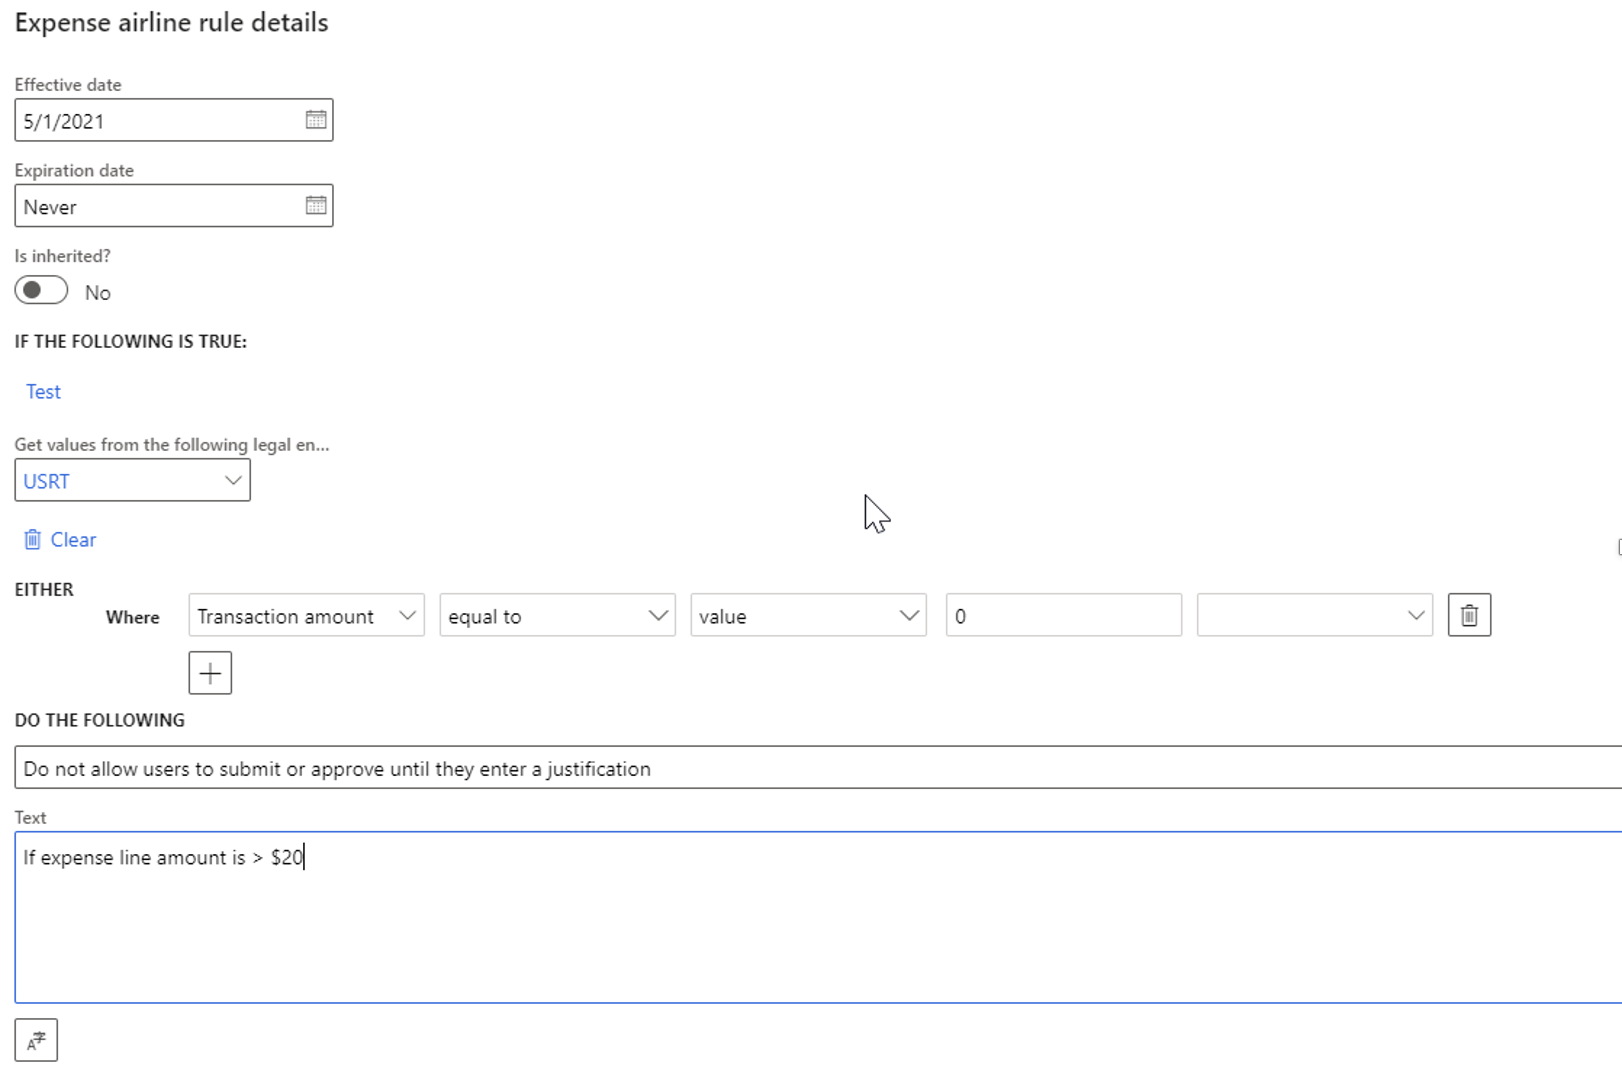
7) Choose an effective date and expiration date
8) Choose a condition, for example: If the expense line amount is > $20
9) Choose a do the following, for example: Do not allow the user to submit or approve and display an error message
10) Enter an error message by clicking on the symbol just below the message box.
11) Click OK and your expense policy will be created.

Once you have your expense policies configured you can rely on the system to prevent expenses that are outside of business policies to be approved.
Next Steps
If you are interested in learning more about expense management as well as maximizing the use of Microsoft Dynamics 365 for Finance and Supply Chain Management contact us here to find out how we can help you grow your business. You can also email us at info@loganconsulting.com or call (312) 345-8817.


